How to Remove Scratches from Car – Step By Step Guide
To any owner of car nothing is more frustrating than finding scratches on the surface. As any owner buys cars not just to display them on the showcase but to drive.
It’s very common to get scratches on them. Sometimes because of negligence in driving, or even during parking it is very common to get scratches by any unfortunate incident.
Yes it is very expensive and waste of a lot dollars to fix the scratches by going to a mechanic but you can easily fix them at home with a little knowledge about cars and with right tools.
Below the step by step way of fixing your car scratches is give. By simply following them anyone with a some experiences can remove the car scratches in their houses and ending up saving a lot of money.
Scratches and Their Types
Judging by the harm it done to your car surface there are mainly three major types of car scratches.
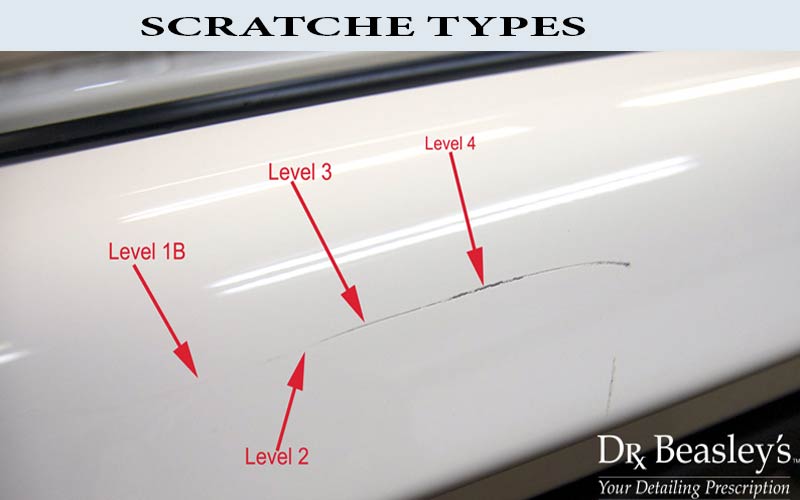
Scratches Types with Level
1. Level one or scratches on the clear coating :
Clear coat is very top layer of a cars surface. It lies just over the paint job. The main job of clear coating is to protect the paint of the car from any kind of environmental harmful contaminants. And fun part is that it is very easy to fix scratches on the part of the surface.
2. Level two or scratches on the primer :
This is basically the layer after the colour coating. This layer also protects the paint of the car. As it is said it is level two, so you have to work a little more on fixing scratches on this layer. It’s still satisfying because your paint layer will still be okay in this level of scratching.
3. Level three or scratches on the paint :
This is the most severe of all the scratches. When something makes a scratch the penetrating all the two layers of clear coating and primer coating and ending up opening the silvery metal part is the scratch on the paint.
Out of three it is the most dangerous and harmful. Because a scratch like this one your car will start forming rust on the surface ending up harming the cars surface permanently.
Gadgets and Tools for Removing Scratch from the Car
- A microfiber cloth
- Brush
- Toothpaste
- Shoe polish
- Masking tape
- Sandpaper
- Primer
- Paint
- Clear Coating
- Wax
- Polishing Contaminant
Process of How to Remove Scratches from the Car
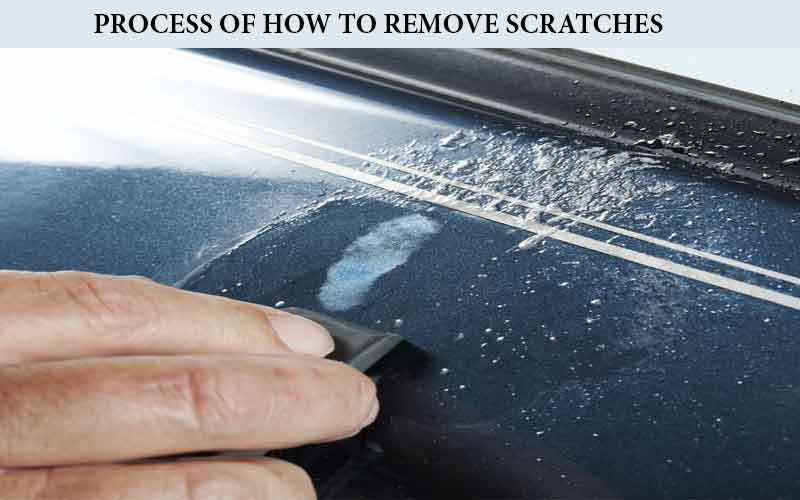
1. Observing and Identifying the Scratch
The very first step is to observe the damaged area and to find the damaged area. For this make sure the scratched area is clean. If it is not clean use any microfiber cloth or brush to remove the dust and dirt from the place.
In the process of examining the damaged area you can use your fingers and fingernails to find out the level of your scratch. If your finger nails get stuck in the scratch then it is not good news. Sadly your scratch in on the paint or in level three.
But luckily if the scratch seem smooth to your fingertips the you should be glad that the scratch may not have passed the clear or primer layer of coating. After identifying comes the fixing part which will be discussed in the later parts.
2. Clear coating scratch and toothpaste
A) Preparing the surface and applying the toothpaste : The first step is to properly clear the affected area with microfiber cloth and then to apply the toothpaste onto the scratch.
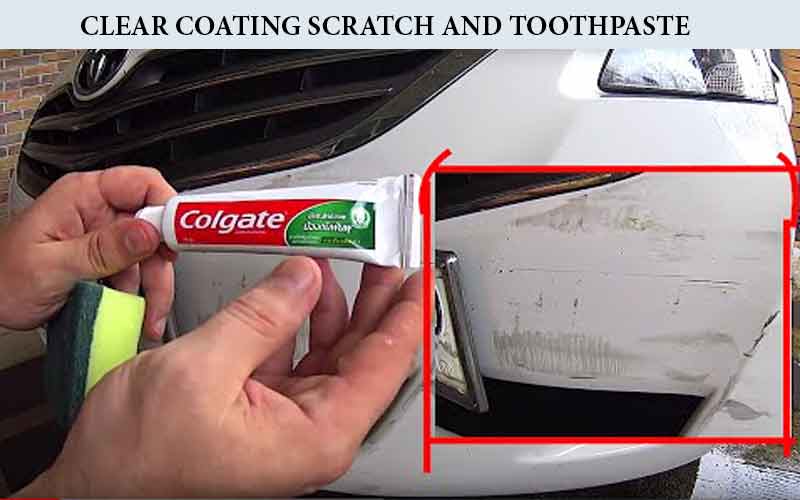
B) Rubbing the component : After applying you need to rub the place very carefully and gently. In case of your rubbing you can follow a single motion like circular.
You have to be very careful that you don’t end up using too much pressure. Also notice if every portion of the area is covered properly.
C) Rinsing and drying the area : The third part comes with rinsing and washing the area properly. After washing you should dry the area with a microfiber towel. After this again examine the area if any scratch is left. If then repeat all three steps again.
3. Clear coating scratch and shoe polish :
A) Applying the polish over the scratch : First step is where you have to clean the area and you have to apply the shoe polish over the scratchBest Swirl Remover in 2020 | In-depth Reviews and the you have rubb the area properly with that contaminant.
B) Using a sandpaper : Then the next step contains a sandpaper and make sure that the paper is wet. And you have to rub the place very carefully with the sandpaper. Be careful that you use more pressure and required.
C) Washing and drying the place : The third step is where you wash and dry the applied area. After than examine the area if any scratch mark remains then you have make sure that repeat these steps again.
D) Waxing : After that you should wax this place for further protection.
4. Steps for deep scratches
A) Outlining the scratch properly : First you will need a tape to outline the area. During this part make sure only the scratch is visible. The success of your painting depends on the outlining. If you accidentally leave any part of the scratch behind the outline can ruin the painting you will do later on the scratch.
B) Removing the scratch : To remove the scratch you will need a sandpaper. First you will have to wet the paper then holding it in between of your fingers rub the area properly.
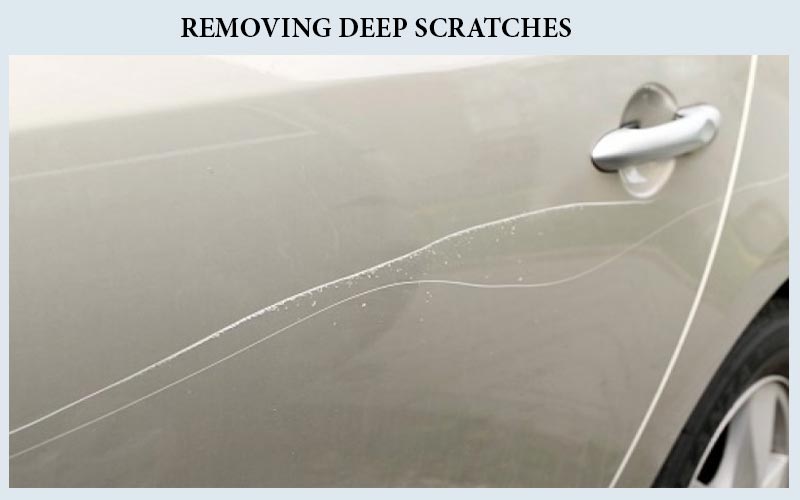
Depending on the scratch different grits of paper should be used. From over two thousands to three or more for the clear coat and less than that for the primer or the paint level. To remove the scratch properly you may to follow this part a while more.
C) Using primer : Deep scratches ends up harming the primer. As a result you definitely need a primer. Make sure the primer doesn’t get much thick and also gets a proper time to dry. There is no book rule about the layers but two to three layers seem okay for the primer.
D) Using Paint : After the primer set the timer for the touch-ups. And this is about the painting part. You can use paint on the scratch by spraying on it but if the area is small you can use a dropper and a little brush at the opening of the dropper as your tool for painting the area. Remember there is no set goals of layer for the painting. Paint as many layers you can until the colour is even.
E) Using clear coating : After the painting part comes the clearing coating. As we know deep scratches end up harming all three layers,so clear coating is the one to be harmed first. After using the clear coating you will remove the tape you first used as outlining the area.
F) Polishing and waxing : This is the last step in fixing the deep scratches on cars. Polishing and waxing will make the area shine like before when it was bought new. Make sure you use a microfiber towel to wipe the surface after using wax or polishing.
Warp Up
Cars and scratches are like magnets and metal objects. As you have a car it will get scratched. During driving or even the time of parking a car can get a scratch very easily. But a scratch ends up becoming a reason for wasting a lot moneys in the repair shops. But if you end up following the steps given upwards. You can remove your car scratches in your home very easily and ending up saving some money.