How to Paint a Brake Calipers – Step By Step Complete Guide
You must’ve known the importance of brake calipers if you own a car. And there’s no doubt that you want those to look fit and perfect behind a set of shiny rims. To make your calipers look good and work fine, you don’t have to spend all your money away.
That’s right! Now you can paint your brake calipers on your own so easily with fewer expenses and give it a better look which is going to last long and be free from rust simultaneously.
How to Paint Brake Calipers Fast and Easy
There are a few different methods to paint brake calipers fast and easy. One might buy a kit that consists of one or two cans of paint, a spray-on cleaner, and an applicator brush if s/he decides to paint the calipers using a brush.
Or, one might use a method of spraying on the calipers rather than brushing those with paint. That will to work for sure but the paint must be designed to endure high temperatures. One might buy a can of clear a high-temperature finishing spray.
At this time, the question arrives that where will the calipers be while you paint them? Well, the answer is, the calipers first need to be separated from the car. Some tend not to do it and they end up painting the areas which they are not supposed to paint.
Removing the Wheels
- When it comes to removing the wheels before preparing the calipers, the process should start by applying the parking brakes, because safety comes first and especially when you are working on your car
- Using a tire iron or an air gun to turn the lug nuts so that the wheels can be removed easily
- Using a jack to lift the car off the ground smoothly
- Using a tire iron to remove the nuts one at a time
- Repeating this process for all the other wheels
Preparing the Calipers for Painting
- Detaching the calipers form the wheels carefully
- Try not to disconnect the caliper from brake line and place the caliper on a box to give it a platform
- Separating the brakes from the caliper to make sure that you don’t ruin them by spraying painting
Necessary Tools for Brake Calipers Paint
Yes, obviously you are excited to paint the brake calipers but before that, here’s some important stuff that might help you to prepare yourself to paint the calipers.
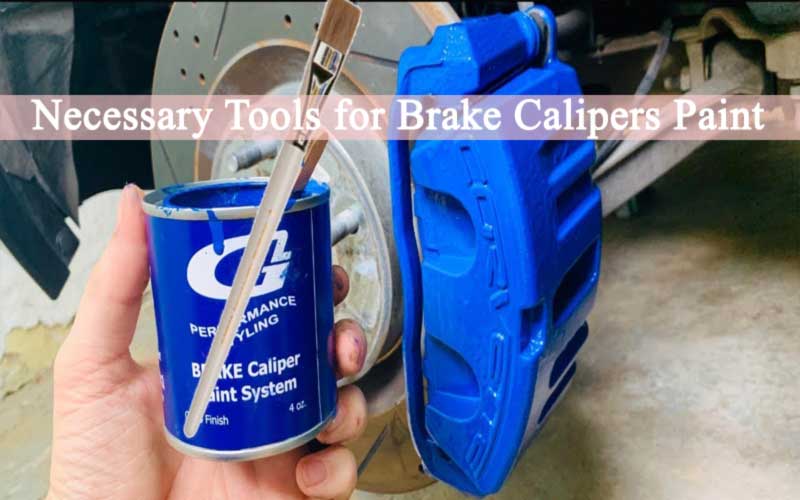
Necessary Tools for Brake Calipers Paint
You must have to have goggles, a dust mask, and gloves on to protect your eyes, nose, face, and hands from the dirt and sprays.
And to do this job you need to use some high-heat spray paint( up to 2000 degrees Fahrenheit), isopropyl alcohol to cleanse it off while you finish sanding and everything, a metal wire brush, a paper towel, a brake cleaner, some 150-230 grit sandpapers and a 600 grit sandpaper, masking tape, newspaper or some waste cloths, plastic grocery bags or whatever you need to cover the places from spraying paints.
The other most important things are time and patience. These will finally give you the ultimate result. And now, coming to the most significant part, cleaning the calipers.
Because without a perfect cleaning, you can’t get the best results. By cleaning thoroughly, you can help prevent the paint from flaking off after the painting. This is the most vital part to warrant that the paint sticks and you will end up getting a good paint job done.
Cleaning Process of Brake Calipers
To clean the calipers, firstly you have to use a metal wire brush to remove the dust off. Try not to brush the rubber on the guide pins, on the brake line, and also down on the pistons, otherwise, they might get damaged.
Next, you need to spray the brake cleaner to remove the bits loosened by the wire brush. And after this is dried, you need to move forward to the sanding with sandpapers.
It’s all in the preparation. The better it sand, the better it’s going to come out. You need to start sanding the calipers with a 150-230 grit sandpaper. It depends on how rusty your calipers are. Try to make sure that it sands all the bends and the corners.
If you want the best results, you can move forward to more fine sandpapers of 600 grit. It will give your calipers a dust-free smooth look and a better coating obviously. You can give the caliper another spraying with brake cleaner. Finally, use rubbing alcohol and a paper towel to clean the calipers one last time.
You will be painting your calipers in no time but before that, you must not forget to cover the important parts that you don’t want to be painted. Use masking tape to cover the rubber protectors around the caliper pistons. You might want to wrap the brake rotor by a newspaper to prevent it from paint.
What is The Best Way to Paint Brake Calipers
You can get a good result by using high-quality brake calipers paint (up to 2000 degrees Fahrenheit). Calipers are exposed to a very high temperature during braking that’s why you need to choose a high-quality paint that is heat resistant or developed especially for calipers.
Now comes the part of spraying. You have to spray multiple coats to get an even paint job, but not continuously. Spray short bursts of streaming, wait at least 5 minutes between each coat of paint. Remember not to apply paint in thick coats. Spray 3-4 coats on the front side of the caliper.
Now it’s time to give it some time to dry, around 30 minutes. Be really gentle to turn the caliper so that you don’t screw the brake line. Repeat the whole process on the opposite side of the caliper.
Again, wait for 30 minutes to let it dry. Depending on the humidity and the temperature, this time may vary. If you don’t want to ruin your painting then you should wait until it’s really dried before replacing the calipers.
This was all about spraying paint on calipers. If you want to paint it rather than spraying, you can do all those mentioned above except spraying. Here you can do is to mix your colors and stir in the reactor. Counting the reactor means you are on a time-frame.
It will take time to use the paint on calipers, say almost four or five hours. And the other processes are almost the same. The coating must not be so thick and you have to wait perfectly till it dry.
It mainly is a personal preference to choose between spraying paint on the calipers or using a brush to color it. Both can give the best result if used properly. So, don’t bother yourself worrying about it.
Once the required time is passed you can uncover the covered area. Now, this may be the perfect time to replace the brake pads if they are beginning to wear thin. Bold the caliper back as it was placed around the roto, and replace the bolts that you removed to take the caliper off. Make sure the bolts are tight and secured.
Settle the tire back on the car, use a tire iron or an air iron to tighten the lug nuts. Gently raise the car above an inch from the ground and use a jack to remove the car from the jack stand. Double check to ensure if your nuts are tight and secure.
Final Words
Now, the final step to wait for the next 24 hours to cure the paint properly. It’s maybe hard to resist but it’s going to be worth it. The time will ensure that the paint doesn’t peel off during the heat of braking and last really long.
The paint is going to last very long and your wheels are going to be praiseworthy. Lastly, take your car to a test drive to check if your brakes are working perfectly and let the heat help to set the paint. Finally, enjoy riding on your “newly painted caliper” wheels!