
How Long Does Ceramic Coating Take to Cure? Complete Timeline Guide
Last Tuesday, I got a frantic call. “My ceramic coating looks terrible! It’s all streaky and cloudy!” The customer had spent $1,200 on a professional coating job, then washed his car 12 hours later. Twelve hours. That’s like taking a cast off a broken arm after one day.
After 15 years in the detailing business and over 5,000 ceramic coating applications, I’ve seen every possible way people mess up the curing process. The good news? It’s completely avoidable if you understand what’s actually happening to your coating.

The Quick Answer You’re Looking For
Ceramic coating takes 24 hours for initial cure, 7 days for functional cure, and up to 30 days for complete cure. But here’s the thing – those numbers mean nothing if you don’t understand what happens at each stage.
Think of it like baking a cake. Sure, it might look done after 20 minutes, but cut into it too early and you’ve got a gooey mess. Same principle here, except we’re talking about $1,000+ worth of protection for your car.
What Actually Happens During Curing?
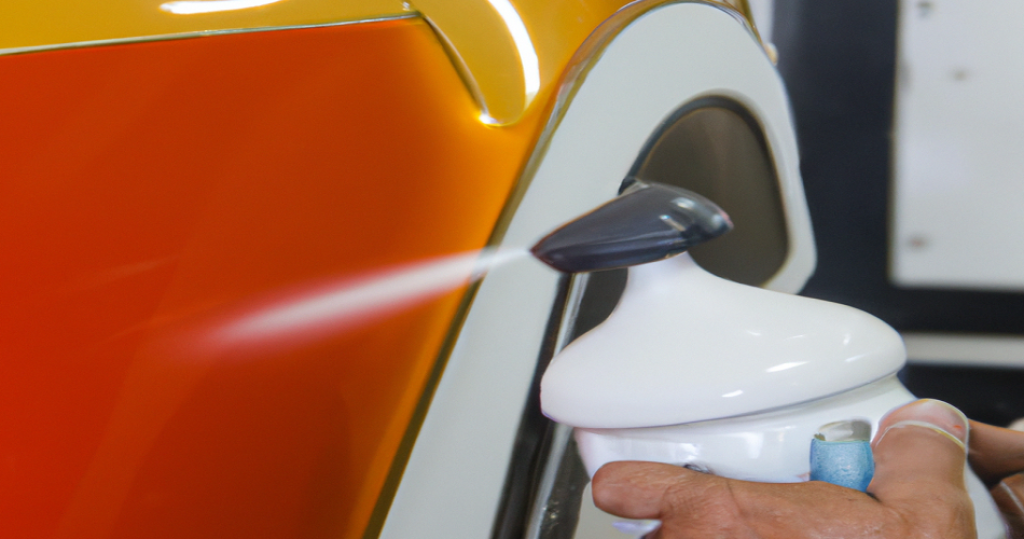
Let me break this down simply. When I apply ceramic coating to your car, it’s not like wax that just sits on top. The coating is literally forming chemical bonds with your paint.
Imagine millions of tiny hands reaching down and grabbing onto your clear coat. That grabbing process? That’s curing. And it doesn’t happen instantly.
The coating goes through three main phases:
- Solvent evaporation (the wet stuff dries)
- Cross-linking (molecules connect together)
- Final hardening (reaches full strength)
Each phase is critical. Skip one, and you might as well have used spray wax from Walmart.
The Hour-by-Hour Breakdown
- 0-1 Hour: The No-Touch Zone
Right after application, your coating is like wet paint. I mean that literally. Touch it, and you’ll leave a permanent fingerprint. One customer’s kid pressed his face against the door to “see if it was dry.” That face print is still there two years later. - 1-4 Hours: Flash Time
The coating starts to level itself out. See those high spots or streaks? This is when they become permanent. Professional installers know to check and level during this window. Miss it, and you’re looking at paint correction to fix it. - 4-12 Hours: Initial Hardening
The surface feels dry, but it’s a trap. The coating is like a frozen pond – solid on top, liquid underneath. This is when most people mess up. “It feels dry, so it must be ready!” Nope. - 12-24 Hours: Critical Phase
This is when the real chemistry happens. The coating is forming its primary bond with your paint. Any contamination now becomes part of the coating forever. I keep cars in a controlled environment during this phase. No dust, no moisture, no nothing. - 24-48 Hours: Water Resistance Develops
After 24 hours, the coating can handle light moisture. Not a car wash, not rain – just humidity and maybe morning dew. The hydrophobic properties start working, but they’re not at full strength. - 48 Hours – 7 Days: Functional Cure
This is when your coating becomes usable. It can handle rain, bird droppings (remove quickly!), and gentle washing. But it’s still gaining strength. Think of it as a teenager – functional but not fully mature. - 7-30 Days: Final Cure
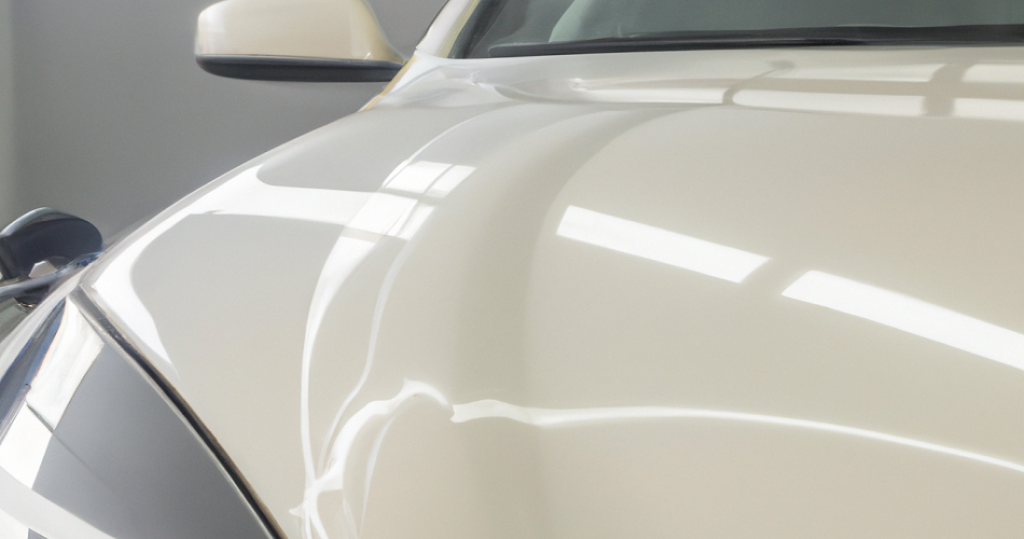
The coating reaches its maximum hardness, chemical resistance, and longevity. Some premium coatings continue improving for a full month. This is when you get the full 9H hardness rating.
Real-World Cure Times for Popular Coatings
I’ve applied them all. Here’s what actually happens:
Gtechniq Crystal Serum Ultra:
- Touch dry: 2 hours
- Rain safe: 12 hours (they claim 2, but I disagree)
- Full cure: 7 days
Ceramic Pro 9H:
- Touch dry: 2 hours
- Rain safe: 24 hours
- Full cure: 14 days
CarPro Cquartz UK 3.0:
- Touch dry: 1 hour
- Rain safe: 24 hours
- Full cure: 7 days
Consumer Grade (Turtle Wax, etc.):
- Touch dry: 30 minutes
- Rain safe: 4-12 hours
- Full cure: 24-48 hours
Notice how consumer products cure faster? They’re also thinner and don’t last as long. Professional coatings take longer because they’re building serious protection.
Factors That Mess With Cure Time
Temperature is the big one. I keep my shop at 68-72°F for a reason. Here’s what happens outside that range:
Too Cold (Below 50°F):
- Cure time doubles or triples
- Risk of haziness
- Weak bond formation
- May never fully cure
Too Hot (Above 85°F):
- Flash cures (causes high spots)
- Uneven thickness
- Reduced working time
- Potential failure
Humidity Matters Too:
- Under 20%: Slow cure, possible cracking
- 40-60%: Perfect range
- Over 70%: Water spot risk, clouding
I had a customer who applied coating in his garage during a Phoenix summer. 115°F ambient temperature. The coating flashed so fast it looked like dragon scales. Complete strip and redo.
The Biggest Curing Mistakes I See
- 1. The Car Wash Itch
“But it’s been 24 hours!” I hear this weekly. Your coating might survive, but why risk it? That first wash can wait. - 2. Rain Roulette
Checking weather apps obsessively, trying to time it perfectly. Just keep it inside for 48 hours. Period. - 3. The Quick Detail
“Just wiping off some dust.” Those swirls you just installed? They’re permanent now. - 4. Parking Under Trees
Sap, pollen, bird bombs – all landing on soft coating. It’s like putting stickers on wet paint. - 5. The Impatience Tax
Rushing because you have a car show this weekend. I charge double for rush jobs because I know what’s coming.
How to Test if Your Coating is Cured
Here’s my professional method:
- The Water Test:
After 48 hours, spray a small area with water. Should bead up like perfect little pearls. Flat spots mean more time needed. - The Touch Test:
Clean finger, light pressure. Any tackiness at all? Not ready. Should feel like glass. - The Slide Test:
Clean microfiber should glide effortlessly. Any grabbing means the coating is still soft.
Accelerating the Cure (The Right Way)
Yes, you can speed things up safely:
- Infrared Curing Lamps:
What pros use. Reduces initial cure from 24 to 4 hours. But it’s specific wavelengths, not just heat. - Climate Control:
Steady 70°F and 50% humidity is the sweet spot. Worth running the AC/heat to maintain it. - Air Movement:
Gentle airflow helps solvents evaporate evenly. Not a fan blowing directly – think whole-room circulation. - What NOT to Do:
- Hair dryers (seen it, doesn’t work)
- Heat guns (goodbye coating)
- Direct sunlight (hello water spots)
- Space heaters (uneven disaster)
Special Situations
Winter Application:
I’ve coated cars in January. It works, but requires:
- Heated garage (mandatory)
- 48+ hours inside minimum
- Longer cure times
- Extra careful first month
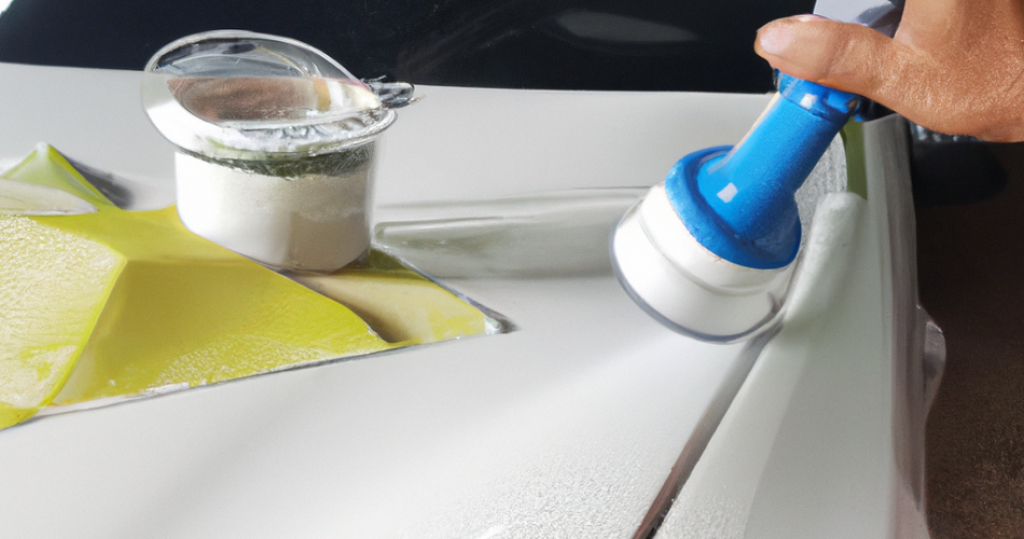
Multi-Layer Coatings:
Each layer needs its own cure time:
- Base layer: 1-4 hours before next layer
- Top layer: Full 24-hour initial cure
- Don’t rush layers – patience pays
Spot Repairs:
Fixing a small area? Same cure rules apply. I’ve seen people destroy entire panels trying to “quick fix” one spot.
The First 30 Days: Critical Care Period
Your coating is cured, but it’s still young. Here’s my month-one protocol:
Week 1:
- No washing unless absolutely necessary
- Remove bird droppings immediately
- Garage parking preferred
- Daily inspection for issues
Week 2-3:
- First wash (gentle, pH neutral only)
- No automatic washes
- Pat dry, don’t drag towels
- Start regular maintenance
Week 4:
- Full normal use
- Consider first coating topper application
- Document condition with photos
- Establish maintenance routine
Professional vs DIY: The Cure Time Reality
Why do my coatings cure better than DIY jobs?
- Environment:
My shop has filtered air, controlled temperature, and zero dust. Your garage has… spiders and lawn mower fumes. - Experience:
I know exactly when each stage completes. No guessing, no hoping. - Equipment:
$5,000 in curing lamps beats hoping for good weather. - Insurance:
If I mess up, I fix it. DIY? You’re on your own.
When Things Go Wrong
I fix botched coatings weekly. Common issues:
- Water Spots During Cure:
Sometimes fixable with light polishing after full cure. Sometimes permanent. - High Spots/Streaking:
Needs leveling within 4 hours or machine polishing later. - Contamination:
Dust, pollen, etc. during cure often means starting over. - Failed Adhesion:
Coating peeling or flaking? Complete strip and redo. No shortcuts..
Read: Does Ceramic Coating Reduce Exhaust Heat
Why Is It Important to Let Ceramic Coating Cure Properly?
The curing period is when the ceramic coating to the paintwork properly. It creates a strong bond with the surface of the car’s paint and works as a sealant. The strength of the bond and the durability of this protective layer actually depend on how well the coating cures.
The ceramic coating doesn’t just save your car from bird droppings, road salt, acid rain, and moisture. It also offers a glossy look for your car. But if the curing process is interrupted, it’s not just the durability that’ll be compromised. Your car will also have a hazy finish. Once the ceramic coating cures properly, it’ll serve you properly for a couple of years straight. That’s why it’s worth the wait.
FAQs Related to Ceramic Coating to Cure
If the car is exposed to rain right after applying the ceramic coating, it can cause some serious damage. It won’t just slow down the curing process, it’ll compromise the strength of the bond. That’s why it’s recommended not to drive the car before it completely cures.
But if the ceramic coating is cured properly, you’ve got nothing to worry about. Ceramic coating creates a smooth surface on your car’s paint and saves it from the negative effects of rain and moisture.
The curing process of the ceramic coating depends on 3 factors. They are – temperature, humidity, and air circulation. Controlling these factors properly can accelerate the curing process. Increasing the temperature will increase the curing speed of the ceramic coating. You can use a room heater for that.
Keeping the relative humidity level below 60% will speed up the curing process. But make sure that it doesn’t fall below 40%. You can use a humidifier and dehumidifier to control humidity. Ensuring proper air circulation can also accelerate the curing process.
If the ceramic coating comes in contact with dust while curing, it can have some adverse effects. Ceramic coating is a polymer solution that creates a bond with the exterior of your car’s paint and works as a sealant. If dust particles enter the scenario, it’ll compromise the whole process.
First of all, the dust will interrupt the bonding process and make the bond weak. Then again, the car won’t get the smooth and glossy finish that it’s supposed to get. The surface will look faded and feel rough.
You should wait at least 24 hours to wipe and clean the ceramic-coated surface. But make sure to avoid using anything abrasive that can damage the layer. Also, don’t put pressure on the surface. Just use a cotton-made wiper and clean the car smoothly. After 3 or 4 weeks, you can clean the car just like you used to.
Ceramic coating takes 7-14 days to cure completely. Initial cure happens in 24 hours, water resistance develops in 48 hours, but full hardness and chemical resistance require 7-14 days depending on the product and conditions.
You can drive after 24 hours in dry conditions. Wait 48 hours before driving in rain. For best results, keep the car garaged for the first 24-48 hours to ensure proper initial curing.
Water exposure before curing causes permanent water spots, hazing, or coating failure. If exposed within 24 hours, the coating may need professional correction or complete removal and reapplication.
Wait minimum 7 days before the first wash. Use only pH-neutral car shampoo and gentle washing techniques. Avoid automatic car washes for the first 30 days.
Yes, significantly. Optimal curing occurs at 60-75°F. Below 50°F adds 50% more cure time. Above 85°F can cause premature curing and defects. Maintain consistent temperature for best results.
Professional IR curing lamps can reduce initial cure from 24 to 4 hours. Maintaining 70°F and 50% humidity helps. Never use hair dryers or direct heat – this causes uneven curing and defects.
Fully cured coating shows perfect water beading, feels completely smooth, and has no tacky spots. Professional installers use water bead tests and slip tests to confirm complete curing.
Drying is surface solvent evaporation (1-4 hours). Curing is the chemical bonding process creating hardness and protection (7-14 days). Coating may feel dry but still be curing internally.
Yes, but cure time doubles below 50°F. Apply in heated garage, maintain 60°F+ for 48 hours minimum. Cold weather applications have higher failure rates without climate control.
Professionals use IR curing lamps, climate-controlled environments, and proper thickness application. This reduces initial cure from 24 to 4-6 hours while ensuring even, complete curing.
Final Thoughts
After thousands of coating applications, I can tell you this: patience pays off. That 7-14 day cure time isn’t a suggestion – it’s chemistry. Rush it, and you’re throwing money away.
I’ve seen $1,500 coating jobs ruined by one rainstorm on day two. I’ve also seen properly cured coatings still beading water perfectly after five years. The difference? Respecting the cure process.
Your ceramic coating is an investment. Give it time to reach full potential. Those first two weeks of babying it will reward you with years of incredible protection.
Remember my customer from the beginning? He learned the hard way. His replacement coating? He left it in my shop for a full week. Three years later, it still looks amazing.
What’s your ceramic coating story? Drop a comment below. Whether it’s a success or disaster, we all learn from shared experiences.